Week08 Electronics Production - 2025 new version#
- Author : Yosuke Tsuchiya, Maki Tanaka
- Date created : 3/13/2025
- Last updated: 3/14/2026
Assignment#
Group Assignment#
- characterize the design rules for your in-house PCB production process
- submit a PCB design to a board house
Individual Assignment#
- make and test a microcontroller development board that you designed
- extra credit: make it with another process
Refer to Assessment Page
Agendas#
- Review of the Class
- Assignment Review
- Workflow of PCB Fabrication
- Checking Individual PCB
Review of the Class#
PCB Fabcrication#
-
Etching
- 大学の研究室とかでの例Link
- Diode Laser + EtchingLink
- 家庭で手に入る素材(クエン酸とオキシドール)でEtching(2020 Tsuchiyama’s Docs)
- 元ネタはこれ
- ラボでは基本的には扱わない方法です(自宅でも下手にやると水道管を溶かすなどのトラブルに発展しますので気をつけて)
-
Machining(切削)
- ファブラボでの標準の手法、今回の課題ではMachiningでの基板制作を行います
- 使用する機材(鎌倉にあるもの)
- Roland SRM-20
- ほとんどの場合でこの機材を使用します。今回の課題制作でもこれを使います。
- Sainsmart Genmitsu 3018 pro ver
- インストラクター(槌屋)が2023に購入して、鎌倉のラボで使えるようにしています
- ただ、切削条件などのパラメータを研究中。SRM-20ほどWorkflowは安定していない
- Roland SRM-20
- ツール(エンドミル)
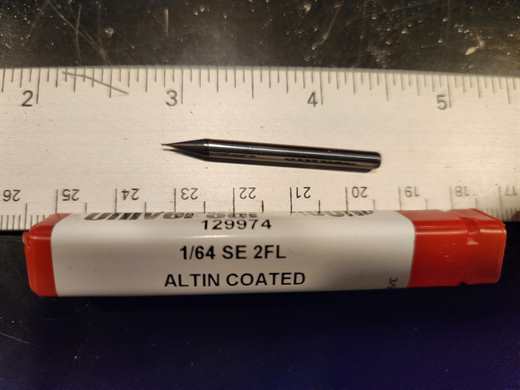
- 1/61 SE 2FL(回路トレース用)
- 受講生用に1本ずつ用意します(各自配布時に名前を記入)
- エンドミルが折れたら2本目以降は、ラボのストックを購入いただくことになります
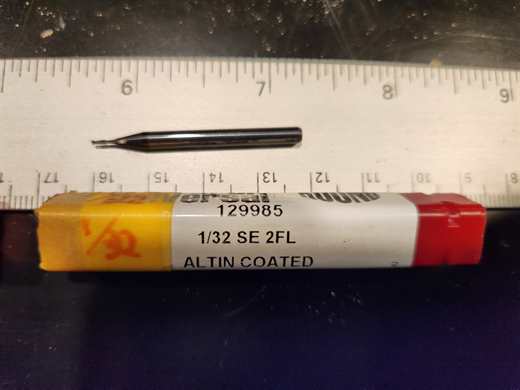
- 1/32 SE 2FL(基板切り出し、穴あけ用)
- 共通で使用するものを1本用意しています
- 2つのエンドミルを付け替えて使用します
- 付け替え時にはZ軸原点のみを再調整(XY軸の原点は変えないように注意)
- 1/61 SE 2FL(回路トレース用)
- 素材
- 紙フェノール(FR-1)の銅板
- 大きさ 100 x 100 mm
- 銅箔の厚み 35um
- 最低限この範囲内に収まる基板にする必要があります
- また、基板はなるべく効率よく使いたいので、設計するPCBは複雑な形にせず(四角形が理想)
- PCBはなるべく小さく設計する
-
Cutting
- ビニールカッターを使用してflexibleなPCBを制作する手法
- 仕上がりは美しかったり、柔軟にできますが、かなりのスキルが必要
- ラボではSilhuette CAMEO O2 / Brotherのビニールカッターを使用する
- ただし、素材に使用する銅箔テープはラボには無いので、トライしたい場合は各自で持ち込み
- 作例としては2019に槌屋がチャレンジ (Link)
-
Laser Cutter
- Fiber Laserを使用した作例があります(ただ、ラボには無いのでできない)
- Xtool F1 Ultra
- ラボにあるTrotecでは絶対にやらないようにしてください(銅板にレーザーが反射して事故ります)
Soldering はんだづけ#
- 今週のもう1つの重要なスキル
- 制作した基板に、各エレクトロニクスの部品をとりつけていきます
- この際、回路デザインを見返して、どの部分にどの部品をつけるか確認する
- ラボのインベントリーから、必要な部品を持ってくる
- はんだごてとはんだはをつかってはんだづけしていく
- これはもう手技の練習です。反復して練習しまくる。
- 部品を取り付けたら、基本的な通電確認を行う
- マルチメータを使って、通電すべきところが通電しているか、通電すべきで無いところはちゃんと通電していないか
- 抵抗値は正しいものを取り付けているか
- 基板に電気をながしてみて、意図した箇所に期待する電圧が来ているか、など
- ちなみにはんだづけが上手じゃ無い写真をドキュメンテーションに載っけると、ニールせんせいに「Terrible!」とつっこまれます。。。
Assessment Review#
Group Work#
characterize the design rules for your in-house PCB production process
ラボの切削マシン(Roland-SRM20)を使って、テストカット用のデータ(trace, interor)を切削します
- この課題を通じて切削によるPCB制作手順を把握してください
- テストデータを 1/64 ミルでトレースし、1/32ミルでカットする
- 1/64のミルで、どこまでトレースが可能かを検証する
- 2025 KamakuraのGroup Work
- 2023 KamakuraのGroup Work
- Shopbotのセッションでも検証しましたし、授業でも言及がありましたが、エンドミルにはEnd of Lifeがあります
- ですので、ラボに残っている過去に使用された受講生たちのエンドミル(最終課題終了まで切削に使用しまくったもの)と、今回のエンドミルでの切れ味を比較してみるといいかもしれません
submit a PCB design to a board house
- 今回から追加。基板制作代行サービスにデザインを投げてみる
- あくまで、どっかのショップを選んで、どれくらいのサイズのPCBを依頼すると、何日程度で仕上がり、いくらくらいかかりそうか、シミュレーション等で算出してみる。実際に制作を依頼する必要はありません(やってもいいですが。。。)
- ガーバーファイルの生成方法を調べる
Individual Asignment#
make and test a microcontroller development board that you designed
- 基本的にはElectronics Designの週に制作したdev boardを制作してもらいます
- 制作したDev Boardが動作していることを確認する必要があります
- 実装したLEDを光らせるプログラムで構わないので、マイコンにアップロードして動作するか確認する
- 動作しているところをHero Shotとして撮影する(10MB以内の動画がベター)
- 可能であれば、Pinoutした先にセンサーなり何かを接続してみて、それを動作させるプログラムを書き込んで確認する
- 基板が正しく動作しない(プログラムが動かない)場合は、原因を特定して回路を修正する
- 最終的にちゃんと動作する回路基板を制作する(ちゃんと動作していることを証明するHero Shotが必要)
Workflow of PCB Fabrication (Machining)#
基本は以下の手順
- CAD(KiCAD)で回路デザインを制作
- KiCADからSVGあるいはPNG形式で回路データを書き出す
- 上記をmodsに読み込み、ツールパスの設定を行い、rmlファイルを生成する
- Community Mods: https://modsproject.org/
- Programs→Roland SRM20 mill 2D PCB を選択
- トレースのデータを生成する場合は、”set PCB default”の”Traces 1/64 flat”ボタンを押す→mill raster 2Dのセクションに1/64のツールパスパラメータが反映される
- 外周カットのデータを生成する場合は、”set PCB default”の”Cutout 1/32 cutout”ボタンを押す→mill raster 2Dのセクションに1/32のcutoutツールパスパラメータが反映される
- 穴あけのデータを生成する場合は、”set PCB default”の”Drill 1/32 drill”ボタンを押す→mill raster 2Dのセクションに1/32のdrillツールパスパラメータが反映される
- Roland SRM-20をコントロールするWindows PCへ 上記のRMLファイルをコピーする
- 1/64 エンドミルのセットアップ
- まずは回路のトレースからはじめるので、1/64 inchのエンドミルを取り付ける
- XY 原点を合わせる
- Z原点を合わせる→ShopbotやGenmitsuみたいなProbe機能がSRMには無いので、手で原点を合わせる(エンドミルの先端を基板上にやさしく落としてコレットを閉めて合わせる
- トレースラインの切削
- 1/32 エンドミルのセットアップ
- 穴あけ→外周の切り落としの順番で行う
- XY原点はそのまま(変えない!)
- エンドミルを1/32に替えて、再度原点を合わせる
- 穴あけ/外周データの切削
- 切削した基板を取り出す
- マシン内の切屑を掃除機で吸い取りクリーンアップ
- はんだづけ!
Checking Your Dev Board Design#
Information#
- Next Week
- Recitationは無し
- クラスはInput Devices(センサー):Electronicsが続きます
- そろそろMTMで何を行うか考えましょう
- Final Projectのページを適宜アップデートしましょう