ATSAMD#
Author : Jun Kawahara (FabLab Kamakura)
Date created : 6/29/2020
updated: 2/15/2021
requirements#
hardware#
- macOS 10.14.4 or higher
- for installing Xcode 11.3
software#
- Xcode 11.3
- required for using GNU Toolchain for ARM Embedded Processors
- Homebrew for installing
GNU AVR Toolchain- GNU Toolchain for ARM Embedded Processors
- libhidapi for edbg
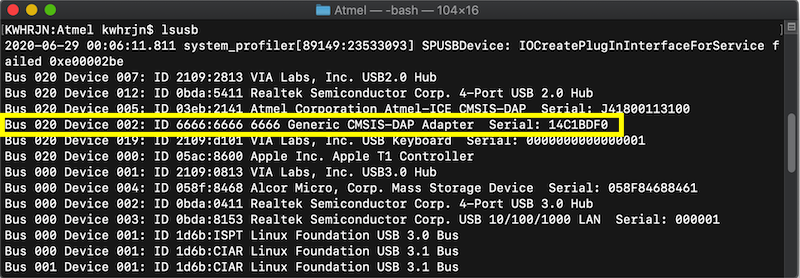
- and for lsusb
- edbg
- OpenOCD
- Advanced Software Framework (ASF) - Microchip
preparations#
macOS version#
Check which macOS version your Mac computer is running. Click on the Apple logo in the top-left corner of the screen. In the dropdown menu that appears, click on “About This Mac.” Make sure your macOS version is 10.14.4 or higherr.
Xcode#
Xcode 11.3 or later is needed. Install or upgrade from App Store.
Homebrew#
Paste that in a macOS Terminal prompt.
$ /usr/bin/ruby -e "$(curl -fsSL https://raw.githubusercontent.com/Homebrew/install/master/install)"
GNU AVR Toolchain#
This is for conventional microcontrollers.
download homebrew-avr
$ brew tap osx-cross/avr
$ brew install avr-gcc
GNU Toolchain for ARM Embedded Processors#
To install the entire ARM toolchain,
$ brew tap osx-cross/arm
$ brew install arm-gcc-bin
install lsusb#
Run,
brew install lsusb
edbg#
-
Download and upzip edbg, or
$ git clone https://github.com/ataradov/edbg.git -
In the folder, run terminal and make all. A binary file, called edbg will be generated.
-
Make PATH to the folder.
In.bashrcor .bash_profile, add a path to your edbg folder.export PATH=$HOME/(your directory)/edbg:$PATH -
restart a terminal or type source .bash_profile in terminal.
-
Install hidapi, run following command, and type brew list in terminal again.
$ brew install hidapi
OpenOCD#
Run,
brew install openocd
Advanced Software Framework (ASF)#
-
Download Advanced Software Framework (ASF) from Microchip.
As of Feb 11, 2021, its version is 3.49.1. It says it is for Windows (x86/x64), but Mac/Linux users, don’t worry, go download it.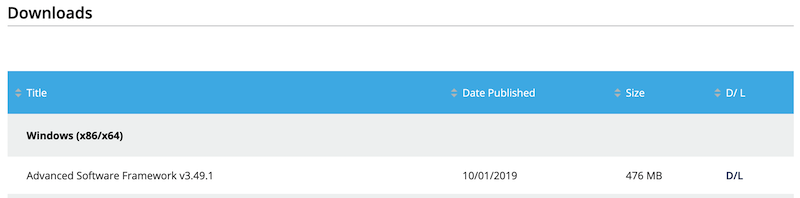
-
Unzipping the file will create a folder, like xdk-asf-3.xx.x.
Download hello.D11C.blink.c and hello.D11C.blink.make and save them in the unziped folder described above. - Open hello.D11C.blink.make, and modify line 7 so to point your unzipped folder.
This is an example if you download ASF to your home directory and rename xdk-asf-3.xx.x folder to Atmel.ASF = $(HOME)/Atmel
Programming SAMD11C#
blink via edbg#
-
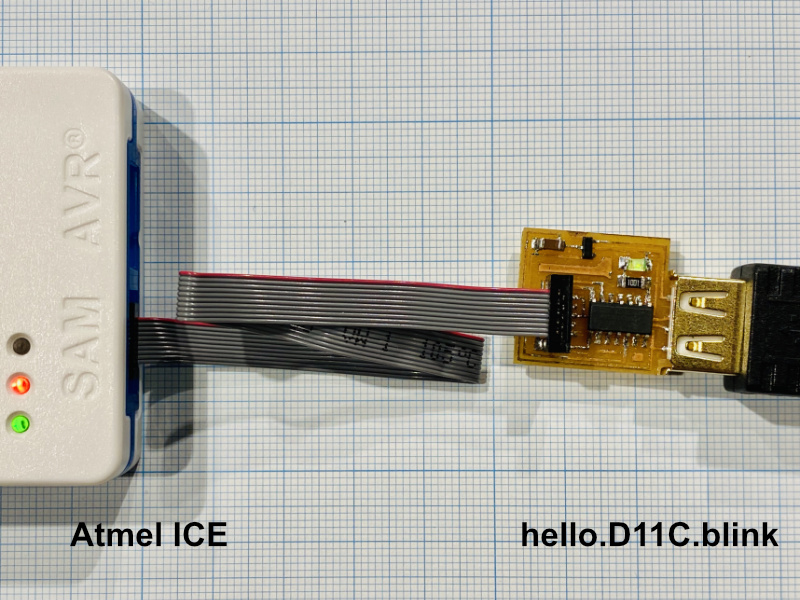
Connect your PC, Atmel-ICE and hello.D11C.blink board with SWD connector.
-
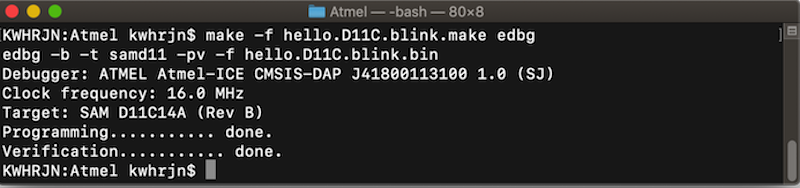
Open terminal and change a directory to Atmel folder. Then type,
$ make -f hello.D11C.blink.make edbgIf all things go well, you’ll get following messages and LED on your board will be blinking.
 Modify delay in hello.D11C.blink.c and make it. LED will be blinking as you set the delay.
Before programming via OpenOCD, remodify delay to see the change.
Modify delay in hello.D11C.blink.c and make it. LED will be blinking as you set the delay.
Before programming via OpenOCD, remodify delay to see the change.
blink via OpenOCD#
-
Type,
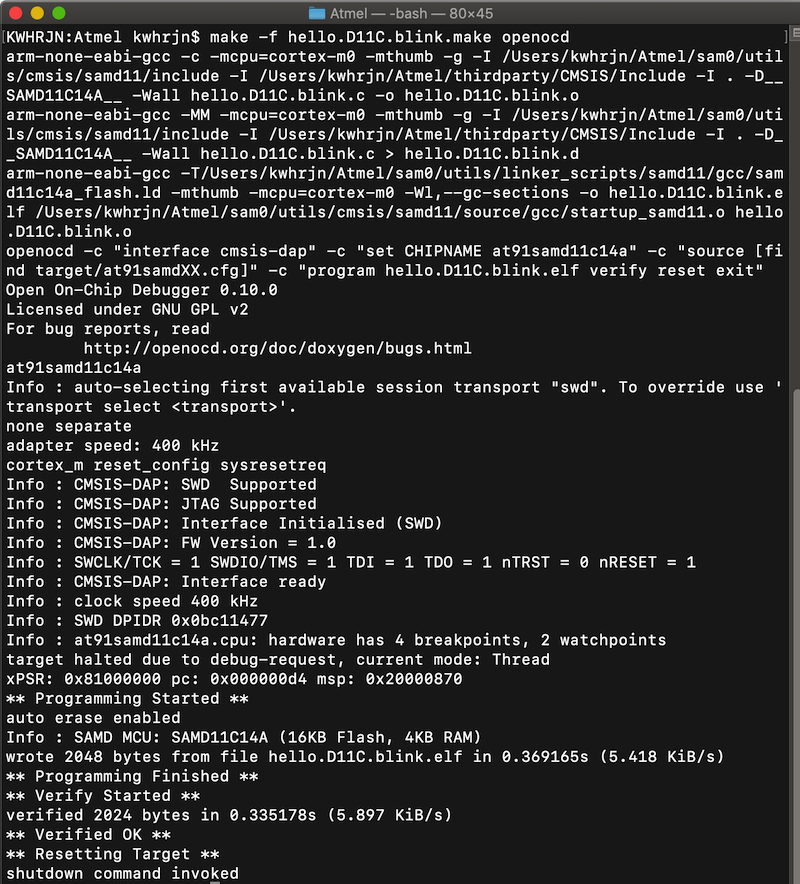
$ make -f hello.D11C.blink.make openocdIf all things go well, you’ll get following messages and LED on your board will be blinking as you programed via edbg.
echo via Arduino IDE#
-
Install board package for ATSAMD11C. Open Arduino > preferences… Add following URL to Additional Boards Manager URLs section.
http://www.mattairtech.com/software/arduino/package_MattairTech_index.json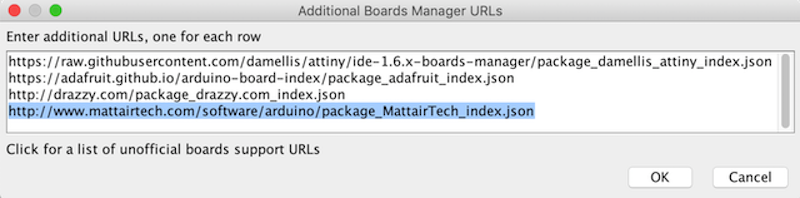
-
Go Tools > Board > Board Mangers…, search
mattairand install MattaireTech SAM D|L|C core for Arduino.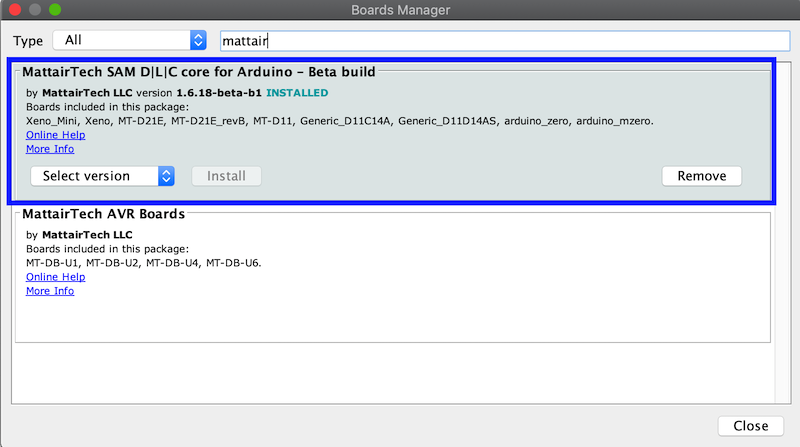
-
Download a bootloader and save it Atmel folder. Then type,
If all things go well, you’ll get following messages.$ make -f hello.D11C.blink.make bootloader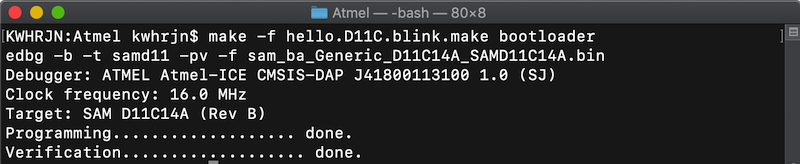
-
Download hello.D11C.echo.ino and open it with Arduino IDE. Select a board, clock source as an image shown below. You are also able to select your device port if you burned a bootloader right.
Then, upload a sketch.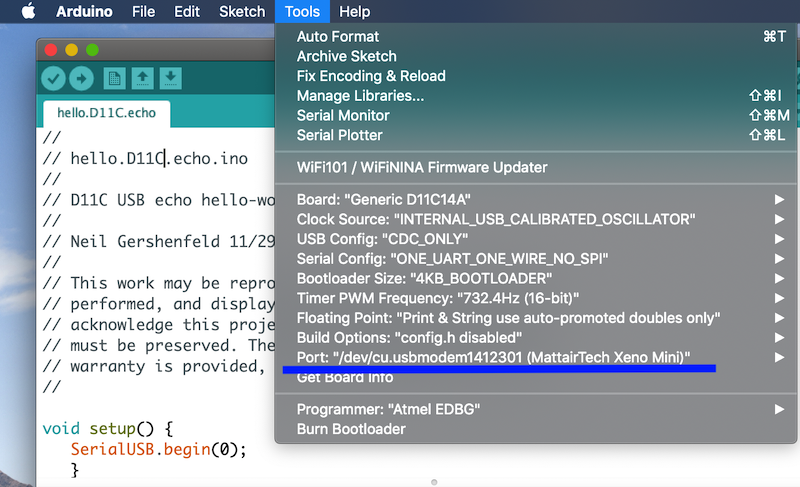
-
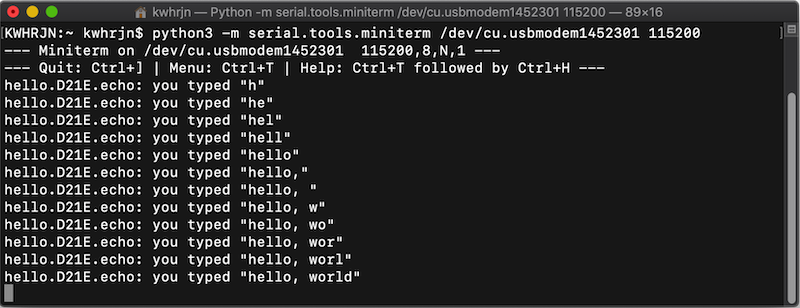
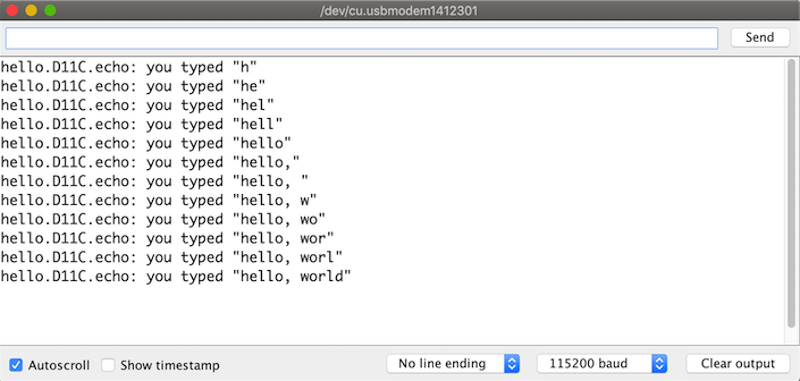
Open the serial monitor and type a byte character and enter. hello.D11C.echo board will return the character you typed. Select No line ending to get a proper result.
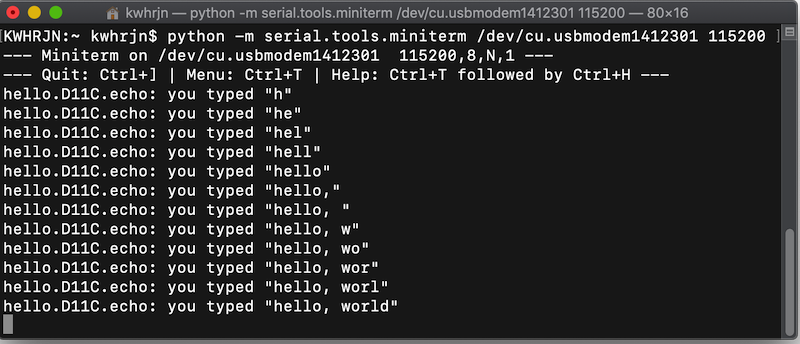
You can also use serial.tools.miniterm to communicate with your board.
program with your own programmer#
Examples above, I used an Atmel ICE, but you are going to make your own programmer in Fab Academy. As you use FabISP or FabTinyISP to program an AVR microcontroller, you need CMSIS-DAP compliant programmer instead of an Atmel ICE.
-
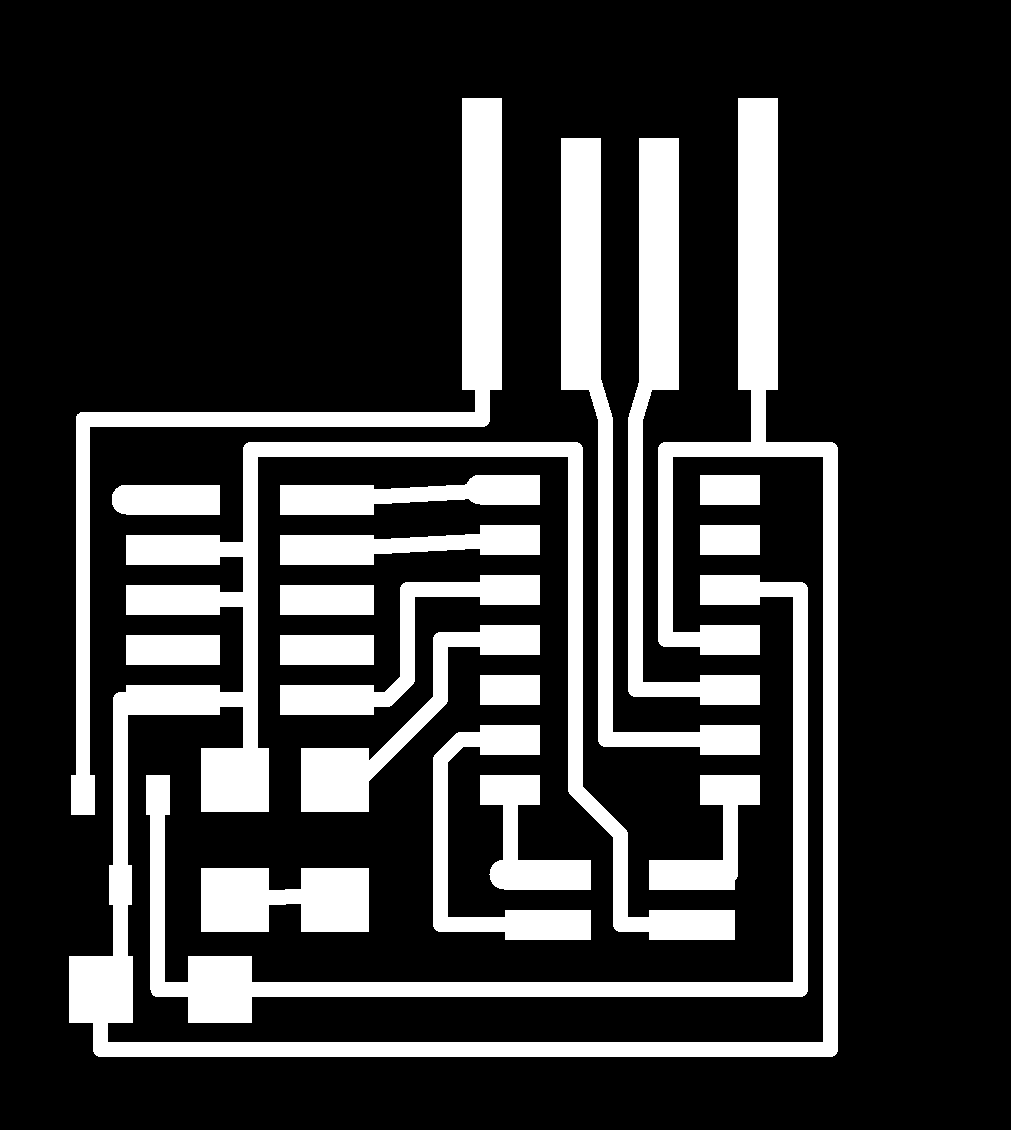
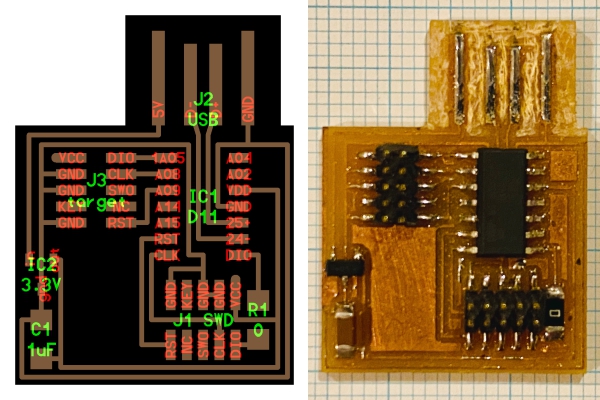
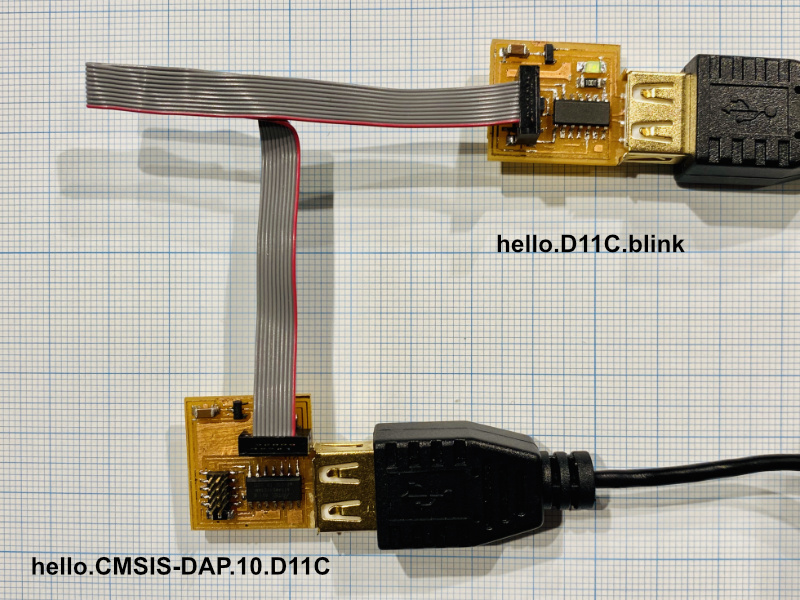
make hello.CMSIS-DAP.10.D11C board
-
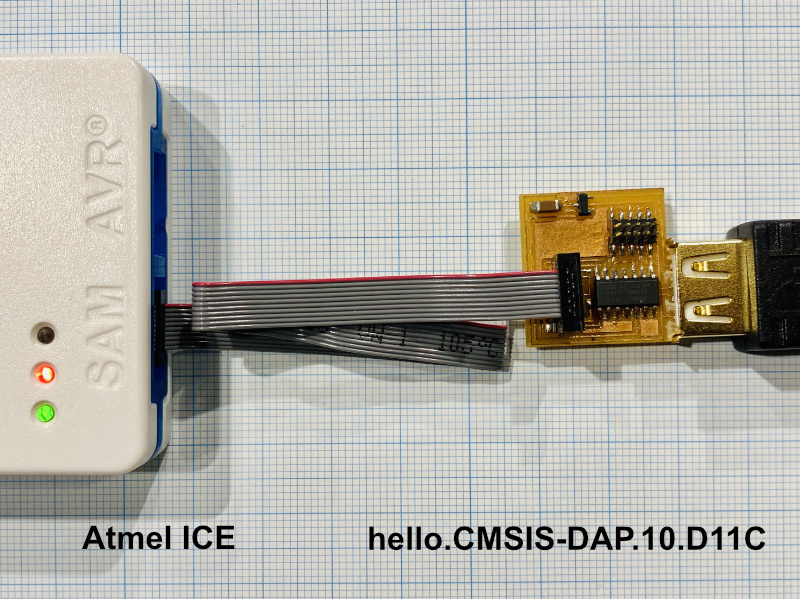
Connect your host PC, Atmel ICE and hello.CMSIS-DAP.10.D11C board with SWD connector.
-
Type command like below. Atmel ICE serial depends yours.
edbg -t samd11 -bpv -f free_dap_d11c_mini.bin -s "Atmel ICE's Serial"
If you could write a firmware onto a hello.CMSIS-DAP.10.D11C board, your host PC is supposed to recognize the board as a CMSIS-DAP compliant adapter. Now you have your own programmer, the hello.CMSIS-DAP10.D11C work as Atmel ICE.
-
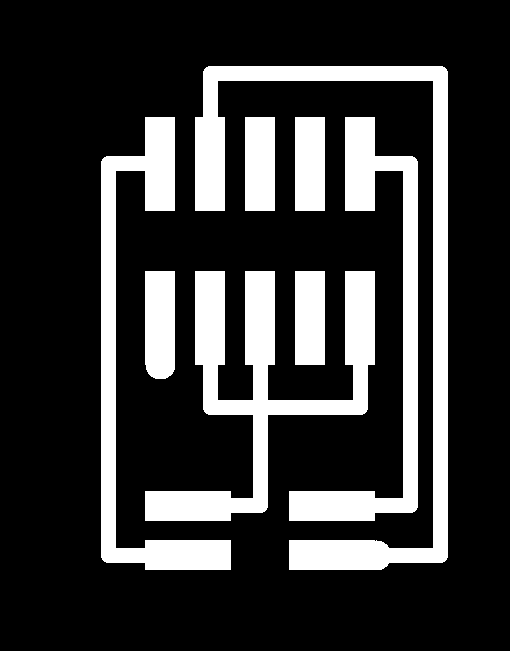
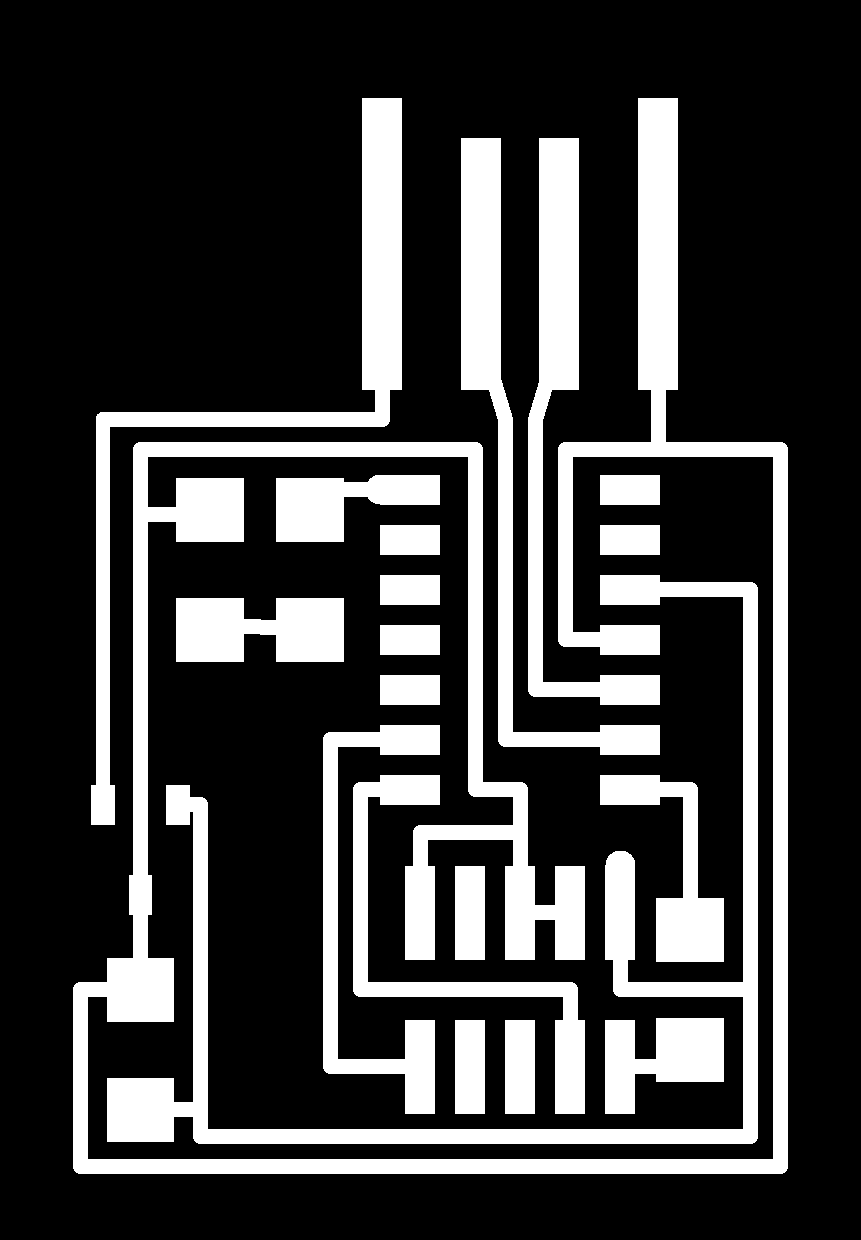
Connect your host PC, hello.CMSIS-DAP.10.D11C and hello.D11C.blink(traces, interior) board with SWD connector.
-
Type command like below.
After you get following messages, an LED on your board will be blinking.make -f hello.D11C.blink.make openocd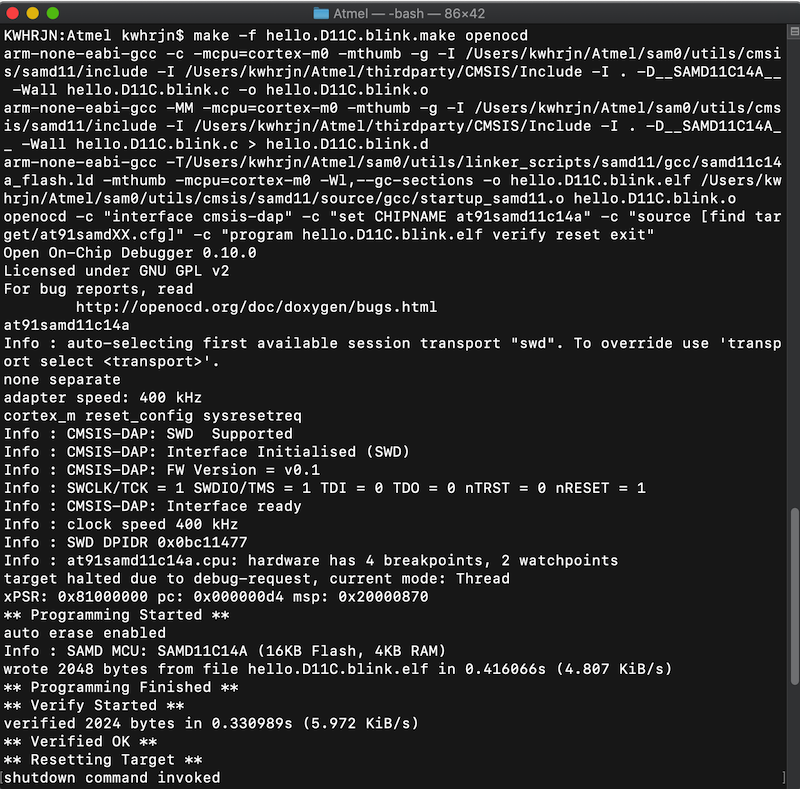
Note
Neil uses edbg instead of openocd, but I couldn’t program with it. I don’t know why.
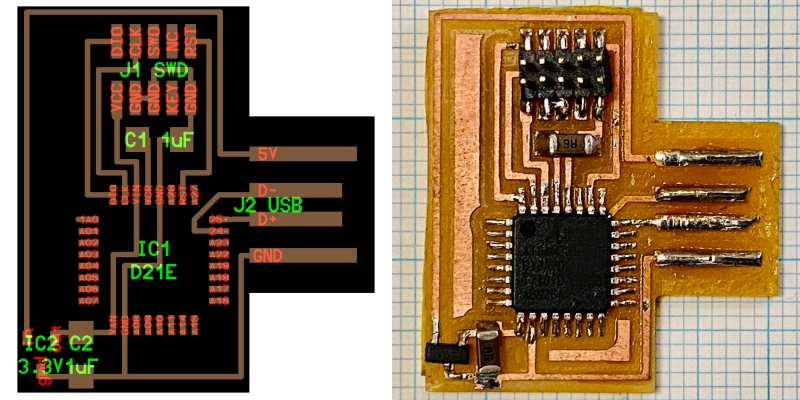
Programming SAMD21E#
-
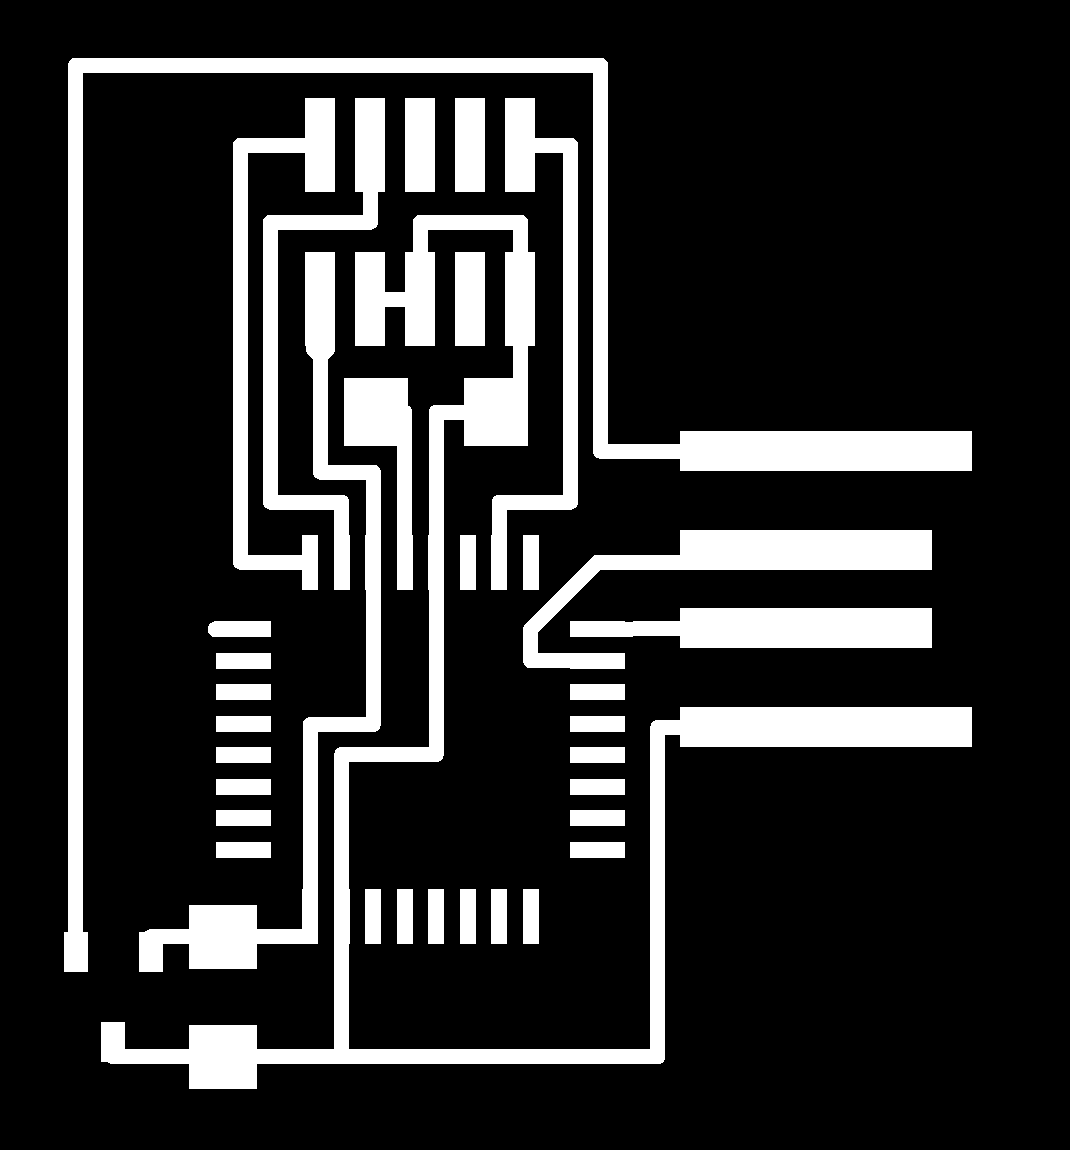
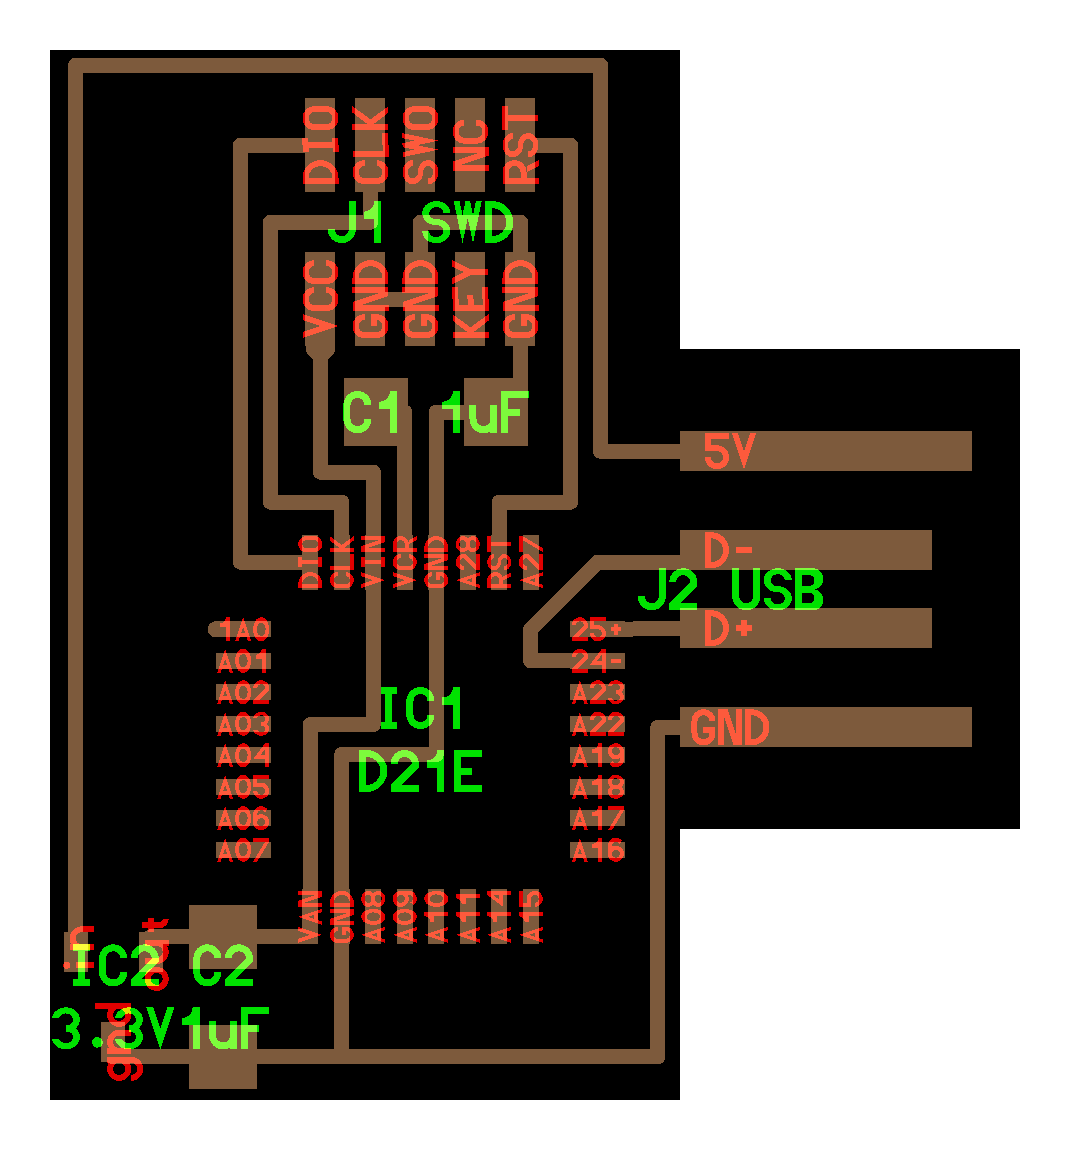
Make your hello.D21E.echo board.
-
Connect your PC, hello.CMSIS-DAP.10.D11C and hello.D21E.echo board with SWD connector.
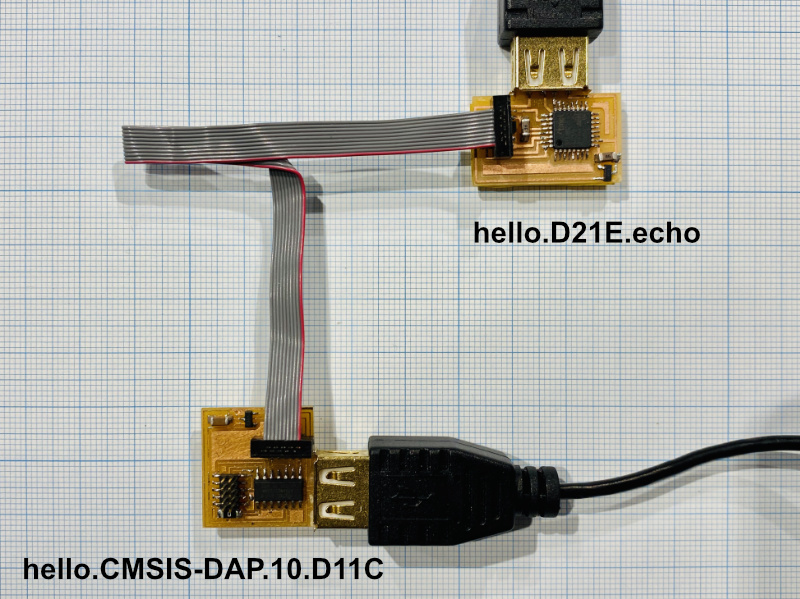
-
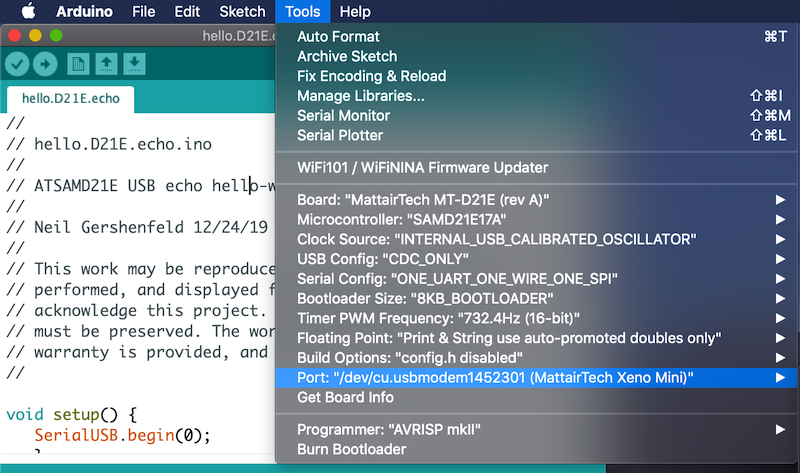
Download hello.D21E.echo.ino and open it with Arduino IDE.
Go Tools > Board. Select “Board”, “Microcontrollers”, and “Clock Source” as an image shown below. Then Burn Bootloader.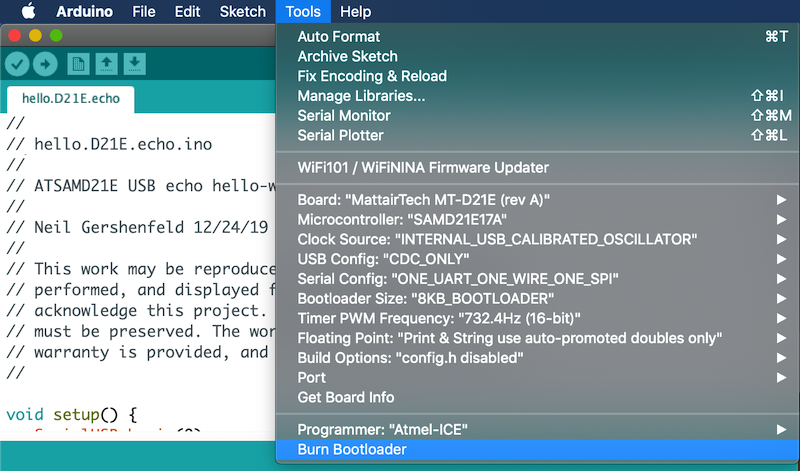
You’ll see following messages if you can successfully burn a bootloader.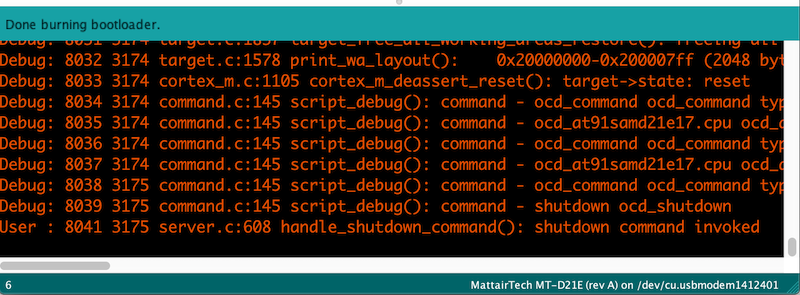
Now Arduino IDE’ll be able to find serial port for the D21E board.
Note
Neil uses edbg instead of Arduino IDE, and a bootloader is sam_ba_MT_D21E_rev_B_SAMD21E17A.bin. I couldn’t burn the bootloader with edbg, and rev_B doesn’t work with Arduino IDE either. So, I selected “MattairTech MT-D21E (rev A) and could burn a bootloader.
-
Upload an echo sketch, and Open the serial monitor and type a byte character and enter. hello.D21E.echo board will return the character you typed. Select No line ending to get a proper result.

You can also use serial.tools.miniterm as mentioned above.